Perhaps someone out there woke up one day and thought to themselves:
You know what I want? I want nearly every website I visit today to throw a pop-up in my face offering to notify me about whatever they find exciting! That way, when I’m minding my own business trying to get stuff done, I’ll have brand new distractions to prevent me from being able to concentrate!
…but that isn’t something I’ve dreamed of, personally. And you may have detected a mild tone of sarcasm here (if not, I apologize that it wasn’t more obvious), but the bottom line is that I really don’t want to be bothered.
I don’t want to be bothered with the question about whether I’d like to get notifications, not to mention notifications themselves!
Good News: You Can Block These in Your Browser
And I mean you can block the questions as well as the actual notifications.
Thanks to Steve Gibson from Gibson Research Corporation, who mentioned this on a recent episode of the Security Now! podcast, here’s a handy set of instructions for you.
Time needed: 2 minutes
How to Block Websites from Offering Notifications in Google Chrome
Open Chrome’s 3-dot menu and click “Settings”
Using any desktop version of Google Chrome*, locate the 3-dot menu (from Windows and Linux, this is typically at the top right), click it, and then choose “Settings” from the menu that drops down.
*or Chromium, if you’re rocking the open source version like I am.Security Now!
Click “Advanced” (at the bottom), then find “Content Settings” (or “Site Settings”) in the “Privacy and Security” section
The setting we’re looking for is hidden under the “Advanced” section, which you can find by scrolling all the way to the bottom of the “Settings” page that opens up. Once you click “Advanced,” the page expands and you’ll see a new section called “Privacy and Security” which contains a number of rows of options.
Look for the option labeled “Content Settings” (that’s what it was called in my version) or “Site Settings” (this is what Steve Gibson’s instructions said, so his version—and maybe yours too!—might be different).
Click on the “Notifications” option, then move the “Ask before sending” slider to the left
When you click “Notifications,” a new screen opens up, and if your version of Google Chrome still has the default setting, you’ll see a line near the top that reads, “Ask before sending (recommended).”
When you move that slider to the left, it turns the notifications requests off, and you should see the text change to “Blocked”.
Voila! No more requests from websites!
(While you’re here, you should see a list of any specific sites you’ve either “blocked” or “allowed” notifications from, and you can review/edit your settings.)
How to Block Notification Requests in Firefox
If you use Mozilla Firefox, which is my “daily driver” browser these days, you can block these notifications requests there as well. Here’s how:
Open a new tab in Firefox and type the following in the address bar:
about:config
You will most likely see a warning that says, “This might void your warranty!” If so, click “I accept the risk!” to continue.
You’ll see a search box at the top of a long list of configuration items. Type in:
webnotifications
…and press “Enter”
Locate the setting named, “dom.notifications.enabled” and toggle it to “false.” (I did this by double-clicking it.) It should turn “bold” in appearance, and the “status” column should change to “modified.”
Close the tab. You’re done!
How to Test Your Browser to Confirm the New Settings
As Steve Gibson pointed out, Mozilla (makers of Firefox) were kind enough to build a page just so we can test our browsers to see if the notifications settings change was successful or not.
Well actually, the page was built to serve as part of Mozilla’s excellent developer documentation, but if you visit it from a browser that has the notifications enabled (which they are in most browsers by default), it will pop up a request every time!
OK it’s not every day that I get super excited about new WordPress features. But today, Matt announced something that made me jump out of my chair and yell for joy.
The idea is that you create your content in Google Docs, using all of the lovely collaborative features like multiple (even simultaneous!) authors, commenting, great editing tools, cloud-based storage, and so forth.
Then… once it’s ready to go, push a button and voila! — the content shows up in your WordPress site.
The magic happens thanks to Jetpack, which we users of the WordPress software use to connect up our self-hosted sites to Automattic’s WordPress.com infrastructure.
So… you need to have the Jetpack plugin enabled and your site connected.
Then you need to use the WordPress.com for Google Docs add-in (that link goes to the Google Web Store page for the add-in, but you can also get it by going to “Add-ons” inside a Google Doc).
As much as I love the WordPress editor, this is a game changer. I live in Google Docs, especially since I acquired my first Chromebook about a year ago.
There’s one more hiccup. The authentication passes through multiple layers (after all, you wouldn’t want just anyone editing a Google Doc to be able to push content to your website, would you?):
Your Google Account (make sure you’re signed in to the one you want)
Your WordPress.com account — meaning the account that you used to connect your self-hosted WordPress site up to the Jetpack/WordPress.com infrastructure. (Here again: make you’re signed in to the right one!)
Your local WordPress account (meaning the account that you sign in to your actual WordPress site with)
It was at that last authentication step that I hit a snag:
I had never activated the Jetpack JSON API on this site. So… I had to go through the Authorization process one more time after fixing that.
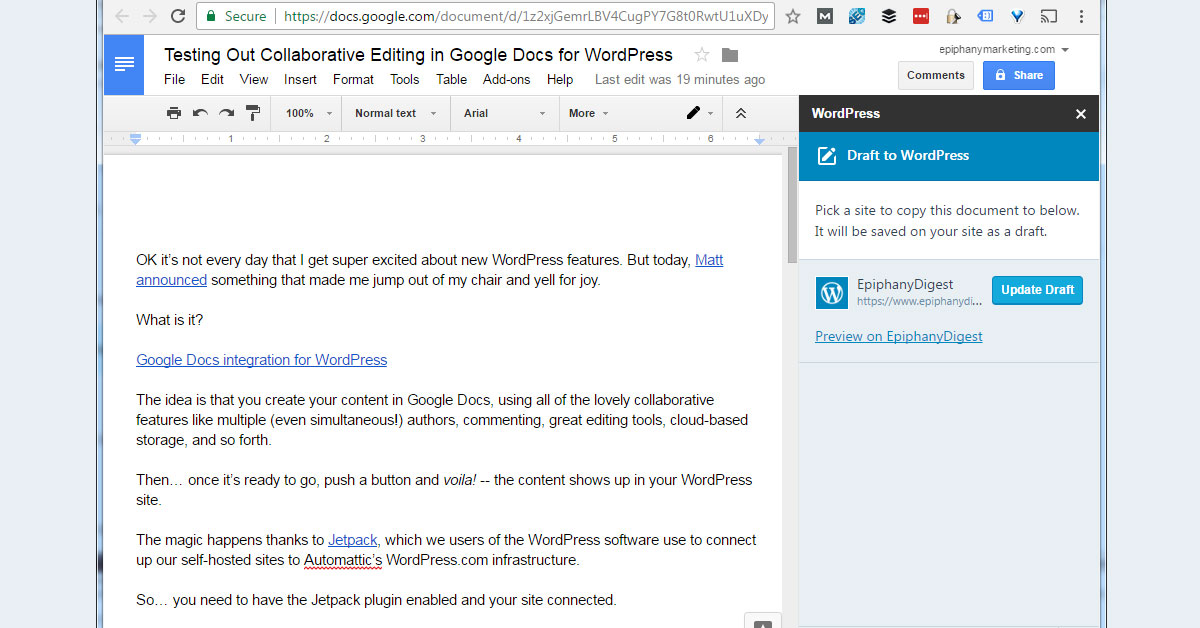
But hey! Needing to screenshot an error message gave me a chance to see how images work in this whole process. I’ll let you know once this content gets pushed to my WordPress site!
Update
After hitting the “Save Draft” button, my content got magically pushed to this site. (If you hadn’t figured it out, I wrote the first draft of this in Google Docs!)
The image came along with it!
But…. my cropping didn’t. The image above is the full screenshot. In Google Docs, I had cropped it to get rid of the 37 Chrome tabs and so forth (hyperbole, I know, but that’s only one of my 3 current Chrome windows!).
All in all, this is a fantastic experience. There’s even a button in Google Docs to “Preview” the post on the live site, and of course a way to update the draft from Google Docs.
I’m guessing you’ll have to manage your own workflow for which version is the latest. I assume if I make changes on my site, but then hit the “Update Draft” button in Google Docs, that version will overwrite whatever is on the site. But this is to be expected. (And I haven’t tested it yet, so… who knows?)
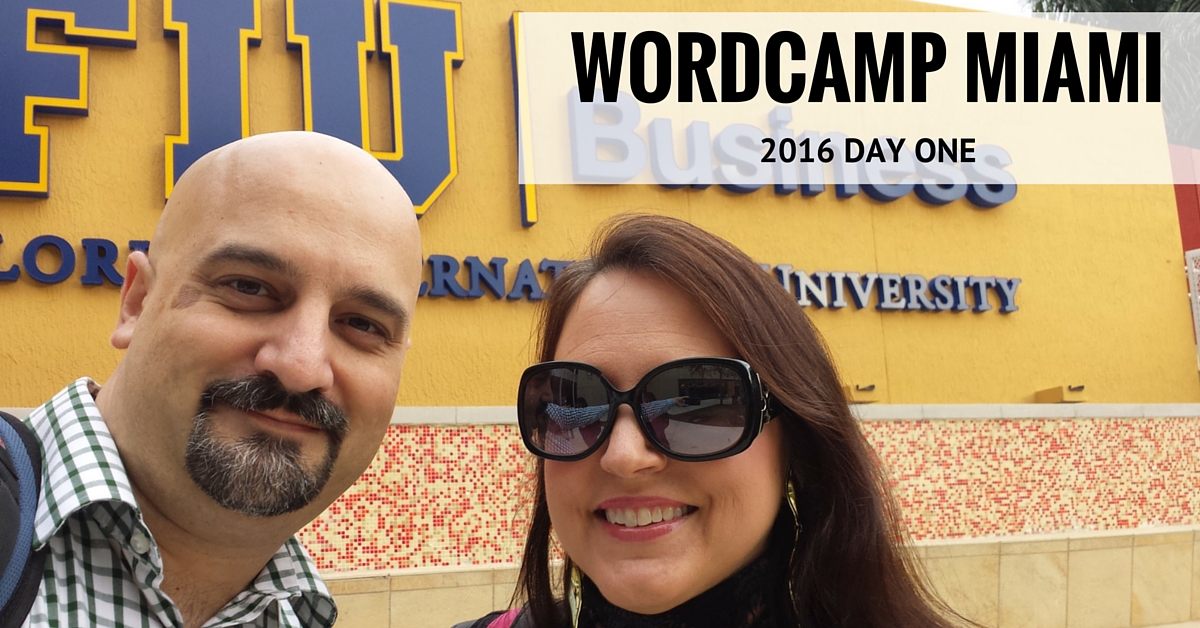
My amazing wife & business partner, @GracefulJill, and I arrived on campus at FIU today just in time to get a great parking spot and jump in the registration line.
Right away, the #WCMIA team showed that they had done a great job getting things organized—the registration line ran smoothly, and we got some great event swag.
After visiting some of the sponsors’ tables, we staked out a couple of seats for the opening remarks session
We planned to divide & conquer, but ended up both catching the session “How to Keep a Client Happy” by Christina Siegler on the Content & Design track.
After that session, I snuck over to the Development track to hear a couple of more technical sessions, and Jill stayed for more Content & Design goodness. She spoke very highly of the session with Michelle Schulp on “Becoming The Client Your Developer Loves”—so much so that I’m planning to catch the recording.
In “Writing Multilingual Plugins and Themes,” John Bloch didn’t shy away from tech issues, and he dug right into code samples while explaining the concepts around internationalization (“I18N” for short).
Then I caught Chris Wiegman, whom I’ve gotten somewhat acquainted with since he relocated to paradise Sarasota a little over a year ago. He’s known as an expert in WordPress security, and his “Application Security For WordPress Developers” was entertaining, informative, and thorough… not to mention somewhat over my head in spots.
On my way to the Development track, I bumped into Pam Blizzard, one of the organizers of the WordPress community in Sarasota.
Pam Blizzard, a valuable member of the Sarasota WordPress community
I’ll try to come back and fill in more about our experience as time permits!
The Afternoon
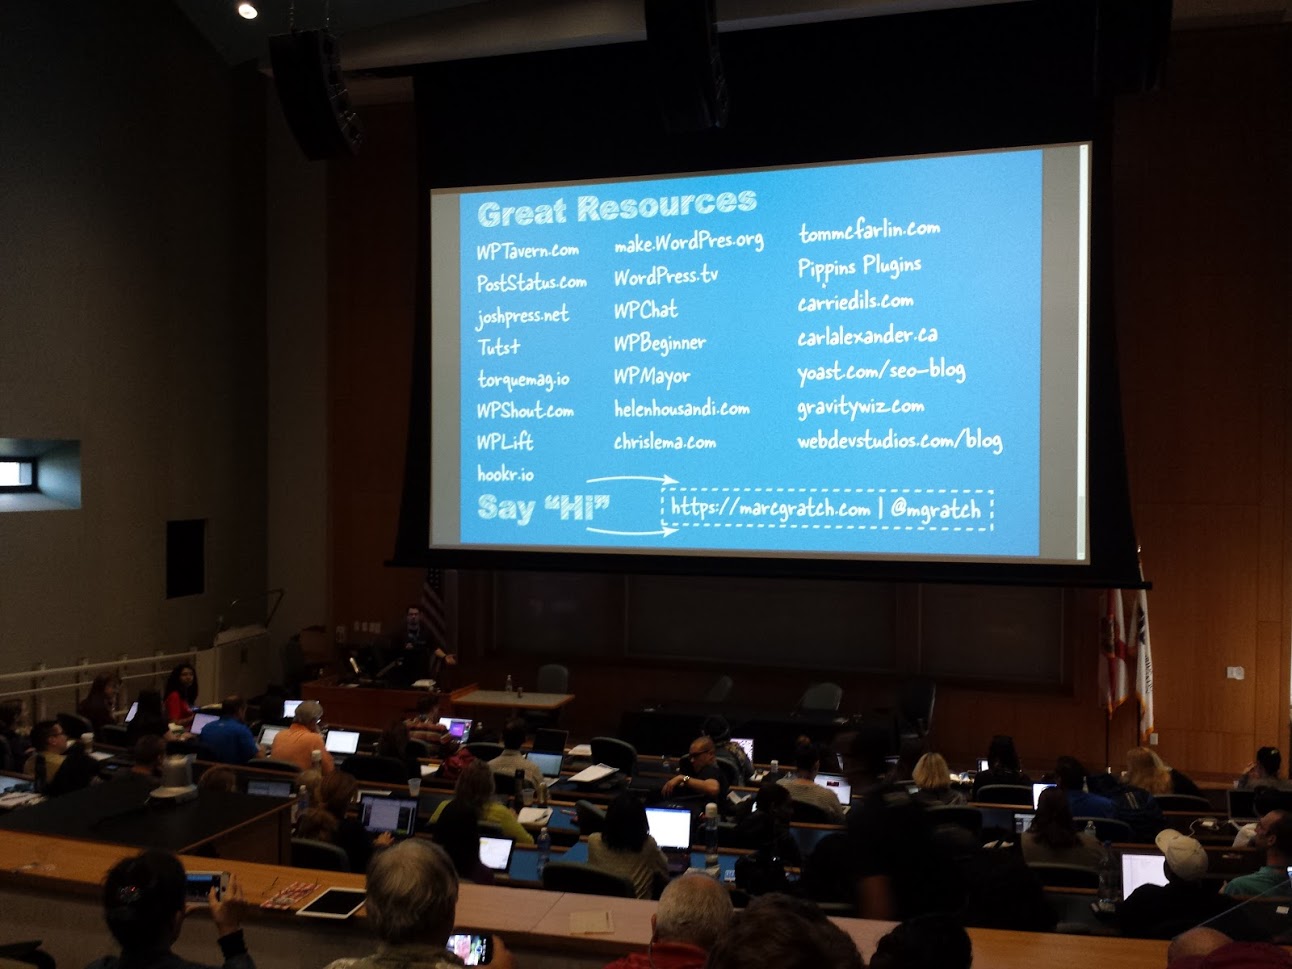
There was an authentic, vulnerable talk on getting the most out of the WordPress community from Marc Gratch. He shared some very personal experiences (that I’m sure many of us can identify with) about working alone & working remotely, and how the amazing WordPress community can be a great support system.
His “give more than you get” approach was fantastic, and true to form, he gave a great of resources he’s built over time:
Then a fast-paced session on building a 6-figure email list with Syed Balkhi, creator of Opt-In Monster, WPBeginner, and many other sites & tools.
Nile Flores did a thorough, informative session on Yoast SEO, but managed to cover quite a bit of “SEO basics” ground in the process. This session should be mandatory for site owners who are new to how Google’s search results work and need a nice overview.
Then I caught up with Jill and we got some great lessons from Dr. Anthony Miyazaki about what is an acceptable number of times to dip your chip into the guacamole. He showed how you have to plan ahead so that you have enough of your chip left to really maximize your dip.
One of the serious considerations of our time is the need to store and have reasonably usable access to all the digital media we are creating.
How often do we snap a photo and upload straight from our mobile devices to services like Instagram and Facebook?
How easy is it, using the apps on our phones, to bang out a tweet or a status update?
But have you ever given any thought to what might happen if those sites disappeared? How much of your personal life is recorded there?
Consider my own situation.
I joined Facebook in 2008, coming up on 8 years ago now, and have had countless meaningful interactions there with people I care about (let’s set aside all the less meaningful interactions for the moment).
In that time, I’ve been through maybe 6 or 7 smartphones. I’ve snapped thousands of photos, many of which I have no idea where to find at the moment*, but some of which I have uploaded to sites like Facebook, Twitter, and various iterations of what is now Google Photos.
Unlike in decades past, today we simply don’t “print” the photos we take (I can’t think of a good reason why I would, frankly), but this means that we also don’t give much consideration to what happens to those photos—not to mention our personal interactions and communications, and even stuff we upload to the web or social networks—after the fact.
I don’t purport to have all the answers. In fact, my purposes in writing this post today are more around sparking some thought rather than speaking to specific solutions, which almost certainly will vary from person to person.
But if you treat your social media profiles like a de facto backup of some of your most treasured photos (like I have), and you’ve had meaningful interactions with others on social networks (like I have), then an important question needs to be raised:
What would you lose if one or more of these sites were to shut down?
This week, I spent a fair amount of time getting better acquainted with some of the principles established by the #Indieweb community. This is a group of people committed to the creation and viability of the “open web.”
The terminology around the “open web” is used to draw a distinction between the web that can and should be created and used by individuals, as opposed to the “corporate web,” which is centered around commercially driven services.
One of the goals of the movement is to keep the web open and free. This doesn’t exclude the usage of paid services—on the contrary, it’s clear that even users of the open web will need to pay for services like domain registration and web hosting (although there are, as I discovered this week, more free options for those items than I would’ve guessed).
In fact, the distinction between the “free and open” web and the “corporate” web isn’t so much one of payment, but rather of ownership, access to, and control over one’s own data.
To illustrate this, IndieWebCamp, one of the groups central to the #IndieWeb movement, maintains a list of “site deaths,” which are often free (but not always) services for users to write blogs and upload/store/share photos, among other things, but which have famously shut down over the years. Often, this leaves users with little or no opportunity to download the data they’ve stored on these services.
Examples? When Geocities shut down in 2009, something like 23 million pages disappeared from the web. Previously, AOL killed off AOL Hometown, removing more than 14 million sites from the web. Google has killed off a number of products, including Google Buzz, Google Reader (which personally affected me), Google Wave, and countless others.
In many cases, users had even paid for the services, but due to a variety of factors, such as:
lack of profitability
changes in ownership
mismanagement
shifts in direction, and even
loss of interest on the part of the owner(s)
…the services get shut down anyway.
There are a couple of tragic ramifications of these site deaths.
One is that often the people most harmed are the ones least knowledgeable about setting up and maintaining their own web presence.
Often the appeal of a free or inexpensive blogging platform (for example) is that one doesn’t need to gain any real know-how in order to use it.
While that’s great in terms of getting people to get started publishing on the web or otherwise using the web (which I’m certainly in favor of), it has often ultimately sucker-punched them by never creating an incentive (until it’s too late, of course) to gain the minimal amount of knowledge and experience they would need to maintain something for themselves.
Even when the users are given the opportunity to download their data, which is not always the case, these are the very people least likely to know how to make use of what they’ve downloaded.
Another tragic loss is for the web community at large. When a service of any significant size shuts down, often this results in the loss of tremendous amounts of information. Vanishing URLs means broken links throughout the parts of the web that remain, which makes the web less useful and more costly to maintain for us all.
Some of what is lost is of more value to the individuals that originally uploaded or published it than to the rest of us, of course. But even personal diaries and blogs that are not widely read contribute to our large-scale understanding of the zeitgeist of the times in which they were created, and that is something that could be preserved, and for which there is value to us from a societal perspective.
Geocities, as an example, has accurately been described as a veritable time capsule of the web as it was in the mid-1990s.
Maintaining Our Freedoms
At the risk of being accused of philosophizing here, I’d like to step away from the pragmatic considerations around the risk of losing content we’ve uploaded, and look for a moment at a more fundamental risk of loss: our freedom of speech.
The more we concentrate our online speech in “silos” controlled by others, the more risk we face that our freedoms will be suppressed.
It’s a simple truth that centralization tends toward control.
Consider this: according to Time, as of mid-2015 that American Facebook users spend nearly 40 minutes per day on the site.
According to a study published in April, 2015, a team of researchers found that the majority of Facebook users were not aware that their news feed was being filtered and controlled by Facebook. (More on this here.)
As a marketer, I’ve understood for many years that as a practical consideration, Facebook must have an algorithm in order to provide users with a decent experience.
But the question is, would Facebook ever intentionally manipulate that experience in order to engineer a particular outcome?
So… we’re spending an enormous amount of our time in an environment where most of the participants are unaware that what they see has been engineered for them. Furthermore, the audience for the content they post to the site is also then being manipulated.
Let me emphasize that it’s clear (to me, at least) that Facebook has to use an algorithm in order to provide the experience to their users that keeps them coming back every day. Most users don’t realize that a real-time feed of all the content published by the other Facebook users they’ve friended and followed, combined with content published by Pages they’ve liked, would actually be unenjoyable, if not entirely unusable.
But the logical consequence of this is that a single point of control has been created. Whether for good or for ill—or for completely benign purposes—control over who sees what we post exists. Furthermore, anyone is at risk of having their account shut down for violating (knowingly or unknowingly, intentionally or otherwise) a constantly-changing, complex terms of service.
So… even if you aren’t concerned about a service like Facebook shutting down, there remains the distinct possibility that you risk losing the content you’ve shared there anyway.
Includes “Freedom of Thought Ben Franklin” by k_donovan11 – Congressional Quote. Licensed under CC BY 2.0 via Wikimedia Commons
In other words, someone else controls—and may, in fact, own—what you’ve posted online.
What Can We Do?
All of this has strengthened my resolve to be committed to the practice of owning and maintaining my own data. It isn’t that I won’t use any commercial services or even the “silos” (like Facebook and Twitter) that are used by larger numbers of people, it’s just that I’m going to make an intentional effort to—where possible—use the principles adopted by the IndieWeb community and others in order to make sure that I create and maintain my own copies of the content I create and upload.
There are 2 principal means of carrying out this effort. One is POSSE: Publish on your Own Site, Syndicate Everywhere (or Elsewhere). This means that I’ll use platforms like Known in order to create content like Tweets and Facebook statuses, as often as practical, and then allow the content to be syndicated from there to Twitter and Facebook. I began tinkering with Known more than a year ago on the site social.thedavidjohnson.com.
As an example, here is a tweet I published recently about this very topic:
Spending some time this week getting better acquainted with the #indiewebcamp community. Lots to learn!
While it looks like any other tweet, the content actually originated here, where my personal archive of the content and the interactions is being permanently maintained. This works for Facebook, as well.
I’m making the decision now to gradually shift the bulk of my publishing on social networks to that site, which will mean sacrificing some convenience, as I’ll have to phase out some tools that I currently use to help me maintain a steady stream of tweets.
The payoff is that I’ll have my own permanent archive of my content.
In the event that I’m not able to find suitable ways to POSSE, I will begin to utilize the PESOS model: Publish Elsewhere, Syndicate to your Own Site.
Since some of the silos that I use don’t permit federation or syndication from other platforms, I’ll be pulling that content from the silo(s) in question back to my own site. An example is Instagram, for which inbound federation is currently difficult, but for which outbound syndication (back to my own site) isachievable.
Not as Hard as it Sounds
I am, admittedly, a geek. This makes me a bit more technically savvy than some people.
But… the truth of the matter is that this really isn’t hard to set up. The IndieWebCamp website provides an enormous wealth of information to help you get started using the principles of the IndieWeb community.
And it can begin with something as simple as grabbing a personal domain name and setting up a simple WordPress site, where if you use the self-hosted version I’ve linked to, you’ll have the ability to publish and syndicate your content using some simple plugins. Alternatively, you could use Known, which has POSSE capabilities (and many others) baked right in.
There are loads of resources on the web to help you take steps toward owning and controlling your own data.
Note: For those who live in or around Sarasota, if there’s enough interest, I’d be open to starting a local group (perhaps something of a Homebrew Website Club), to help facilitate getting people started on this journey. Respond in the comments below or hit me up on Twitter if you’re interested.
Personal Note of Gratitude
I’m indebted to a long series of leaders who have worked to create the open web and have personally influenced me over a number of years to get to where I am today in my thinking. There are many, but I’d like to personally thank a few who have had a greater direct impact on me personally. They are:
Matt Mullenweg, co-founder of WordPress. Matt helped me understand the important role of open source software, and although he didn’t invent the phrase, he personally (through his writings) introduced me to the idea of “free as in speech, not free as in beer.”
Kevin Marks, advocate for the open web whose tech career includes many of the giants (e.g. Google, Apple, Salesforce, and more). Kevin understands the technology, the ethical and societal implications of factors effecting the open web, and has taken on the responsibility of serving as a leader in many ways, including in the IndieWeb community.
Ben Werdmuller, co-founder of Known. Ben and his co-founder, Erin Jo Richey, have also stepped up as leaders, not only creating technology, but endeavoring to live out the principles of the open web.
Leo Laporte, founder of TWiT. As a broadcaster, podcaster, and tech journalist, Leo was instrumental in introducing me to people like Kevin Marks and Ben Werdmuller by creating and providing a platform for concepts like these to be discussed.
As I said, there are plenty more I could mention. In today’s world of the internet, we all owe an incredible debt of gratitude to many who have worked tirelessly and often selflessly to create one of the greatest platforms for free speech in all of history. Their legacy is invaluable, but is now entrusted to us.
Let’s not screw it up.
*I’ve got most of them. They’re stored on a series of hard drives and are largely uncatalogued and cumbersome to access. Obviously, I need to do something about that.
Please be aware that if your spoken words include personal or other sensitive information, that information will be among the data captured and transmitted to a third party through your use of Voice Recognition.
For the record, I don’t own a Samsung Smart TV. And this sentence doesn’t say anything that any of us wouldn’t have guessed… had we thought about it.
But… how many devices do we own today that are listening all the time? And exactly how much of what we say is being recorded and sent to 3rd parties for “voice recognition?”1
I can think of a handful of other devices which are actively listening all the time and are often found in our homes (like the Xbox One / Kinect) or even on our persons (e.g. Google Now on Android — “OK Google” anyone?) and in newer automobiles.
Samsung’s privacy policy is the first instance I can think of wherein I’ve actually read a warning that your “personal” or “sensitive” information may actually be leaking to 3rd parties.
Unnecessary Cause for Alarm?
I would imagine that the bulk of information being transmitted out of our living rooms via Samsung TVs is largely uninteresting to anyone.
But what are the policies that govern the storage (long term or short term) of this data? How sophisticated are the tools that interpret speech? Are transcripts of this speech stored separately or together with audio recordings?
What government agencies have or will gain access to either audio recordings or speech transcripts?
Perhaps the data doesn’t get stored by anyone for any longer than it takes to decide if you’ve issued a command to your device. And maybe there is no reason to even question what happens to all of the information scooped up by these listening devices.
I don’t want to sound like a conspiratorial alarmist. But on the other hand, maybe keeping some tinfoil close by isn’t such a bad idea…
1Geek moment: “voice recognition” is likely a misnomer. It is quite commonly and quite incorrectly used to refer to technologies that recognize speech. True “voice” recognition is a much different technology than “speech” recognition, and involves identifying who the speaker is rather than what he or she is saying. If Samsung or its 3rd-party vendor does have “voice” recognition, that’s a completely different cause for alarm.
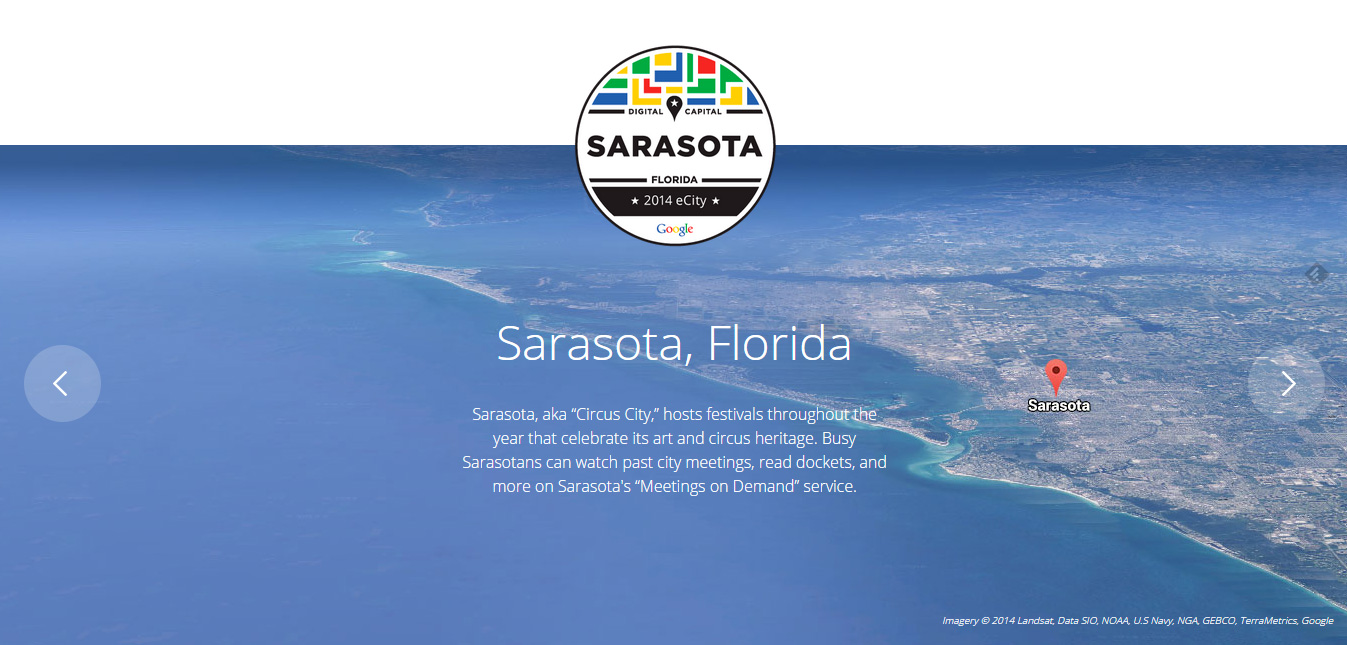
Screenshot: Google Recognizes Sarasota as its 2014 eCity for Florida
This “big little city” that we call home and affectionately refer to as “Paradise” has been recognized by Google for having the, “strongest online business community,” in the State of Florida.
The award represents Google’s belief that businesses in Sarasota are embracing new technology to find and connect with customers.
Google uses its own data, including Search, ad revenue (both fees paid to Google by advertisers and fees paid by Google to publishers), and Ad Grants (provided by Google to non-profits) to estimate the economic impact of Google on each area. This forms the basis of its determination that local businesses are embracing technology.
ABC 7 reported on the reactions from some local businesses following a ceremony yesterday with the Mayor and City Manager.
The Herald-Tribune apparently also reported on the award, but their absurd paywall prevents us from accessing the article, so we won’t bother to link to it.
Congratulations to all of our local businesses who have endeavored to build out a presence online, use social media and other tools, and effectively generate a return on investment with digital advertising tools.
A couple of weeks ago, I got an email from Starbucks letting me know that their Android app was about to get a refresh.
This was good news, because for months now the iOS app has provided users the ability to tip right from inside the app. Since I never carry cash, I almost never leave tips—something I’d be more than happy to do.
The new version of the app was made available a couple of days ago, but today was the first time I’ve made it to a store to test out the tipping function.
The app has a beautiful new UI, which I checked out right away after updating to the new version.
Onboarding inside the app was easy and intuitive. The email a couple of weeks ago had warned that you’d need your password handy upon updating as login would be required. No problem for me, as I’ve been in the habit of reloading from inside the app, which (thankfully) requires the password anyway.
I immediately looked around for the tipping function, but couldn’t find it. It occurred to me after a few minutes of poking around that perhaps it wouldn’t make sense to “tip” until you “pay.”
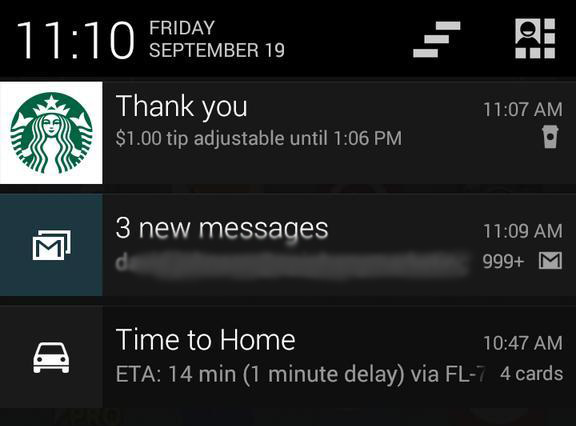
So today I visited one of my local stores and checked out with the app as usual. This time, a notification appeared offering several options for a tip: $.50, $1.00, and a third option that equaled the balance I had on the card (I was close to needing to reload, so it was under $2). The notification also prompted me that tipping would be available until a time that worked out to be 2 hours after my transaction.
So, I tapped $1 and saw the following:
Screenshot: Starbucks Android App with Mobile Tipping
As you can see, the app also allows you to modify your tip if you accidentally bumped the wrong amount. Nice touch!
All in all, I’m very happy with the new app, although I was a bit wary of the new permissions required. Thankfully, I’m using cyanogenmod, so I have the ability to block permissions at a much more granular level, thanks to Privacy Guard. I’ll take a closer look at those shortly.
One other pleasant surprise, for the first time, updating the Starbucks app didn’t cause the “Default Card” setting in my account to get goofed up. That was a mildly irritating “feature” of virtually every other previous version of the app.
One of my great disappointments in life came several years ago when I made the switch to a 64-bit OS for the first time: a 64-bit build of Google Chrome simply did not exist!
OK, I might be exaggerating my disappointment. But only slightly.
But life went on. After a while, my incessant checking for news on this all-important development slowed from daily… to weekly… to… I can’t even remember when I last looked.
And to be honest, I haven’t cared. 32-bit Chrome has been fine… until the last couple of months. I’ve noticed it has begun to consume more and more of my aging laptop’s finite memory. This could, of course, have something to do with the sheer number of tabs and background apps (running in Chrome) that I have open. But that’s beside the point.
Your browser is, after all, likely to be your single most-used piece of software—especially if (like me) you long ago ditched other email clients.
So it came as quite the surprise last night when the Ars Technica announcement zipped by one of my news feeds.
But it was late when I saw it, so I waited till this morning to install it.
The upgrade process to 64-bit Google Chrome was fairly simple, but one step left me questioning whether it had worked, so…
How to Upgrade to the 64-Bit Version of Chrome
There’s currently no upgrade path within Chrome itself to get you over to the 64-bit development channel—making the switch is a manual opt-in process. Here’s how to do it:
Head on over to the official Chrome download page and look for the line that says “You can also download Chrome for Windows 64-bit.” Click the bold words “Windows 64-bit,” which will switch things around so that when you hit the big blue “Download Chrome” button, you’ll get the one you want. Currently, you’re out of luck if you’re a Mac user. (Linux users have had access to 64-bit Chromium for a while now.)
Optional step: At this point, I bookmarked all my open tabs just in case they got lost during the upgrade process. I wasn’t sure how this was gonna go down… so, I’d rather be safe than sorry. I then closed Chrome.
Double-click the Chrome-Setup.exe file that you just downloaded and let it run. This ran and completed, leaving me wondering what the heck had happened. Did it update my Chrome shortcuts in the Start Menu, Taskbar, and Desktop? I don’t know? Will I still be launching the 32-bit version of I click one? I don’t know!
Launch Chrome again. If you’re experience is like mine, all your tabs will reopen and everything will go back to the way it was. Hmmmmm….
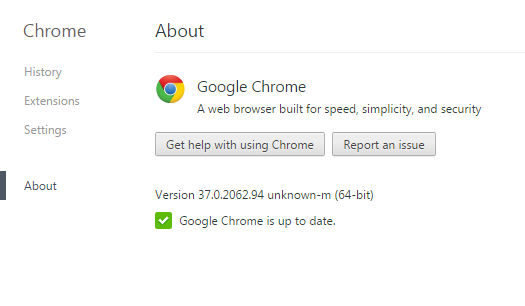
Head over to your hamburger menu and click the “About Google Chrome” item (or just open a tab and type chrome://chrome/ in the address bar). You’ll see a message that reads something pretty close to “Google Chrome is almost finished updating. Relaunch Chrome to complete the update.” (I didn’t screen shot it, but you’ll know it when you see it.) There’s a handy “Relaunch” button.
When Chrome restarts, check chrome://chrome/ again. You should see a shiny new version message like Version 37.0.2062.94 unknown-m (64-bit). The beauty is the “(64-bit)” at the end, of course.
So How Is It?
OK so it’s admittedly a bit early for real serious feedback here. But my preliminary thoughts are pretty solid.
So far, I can’t tell that it’s making any better use of memory (this is one of its promised benefits thanks to they availability of better addressing). But, it’s nice and zippy. The memory usage may not have actually been the real problem I’d been experiencing with the 32-bit version. We’ll see.
Fonts are visibly better. For whatever reason, Chrome has been really bad with font rendering… so much so that I almost made the switch to Firefox over it! This has made me happy.
I’ve had no problems with any of my extensions. I wasn’t expecting any, but the announcement post on the Chromium blog and the Ars story both mentioned lack of support for 32-bit NPAPI plugins. This means you may need to update Silverlight and Java. (I haven’t tried Netflix yet, but I don’t use it on my computer very often anyway. We’ll see what happens.)
All in all… so far, so good. I’ll plan on a more thorough write-up after I’ve had some time behind the wheel. But for now… I’d say go for it!
I’m sure there are lots and lots of these making the rounds at any given time. However, given that a client of ours was recently hijacked with a rather convincing-looking phishing scam, I felt it appropriate to publish this as a courtesy.
This one came in the form of an email. The message came from someone she knew, and it had a personal tone that made it seem a little more convincing than usual. Also, it contained the usual email signature of the sender (complete with their usual “sign-off” phrase, logo, contact info, etc.)
The subject line of the message making the rounds right now reads:
Please check out the document a very useful document that I believe we can all gain from.
If you see one like this, typically you’ll see that you were a bcc recipient. The message that got her had a body that read as follows:
Dear, I tried to get these document across to you before. Did you ever get it? VIEW HERE and sign on with your email to access it as attached on Google.doc, get back to me so we can discuss.
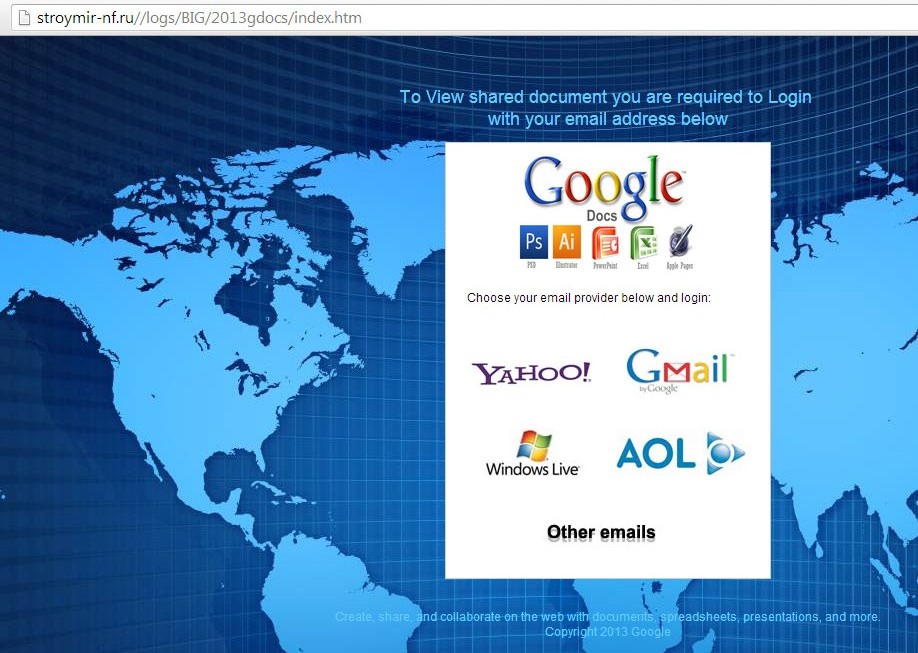
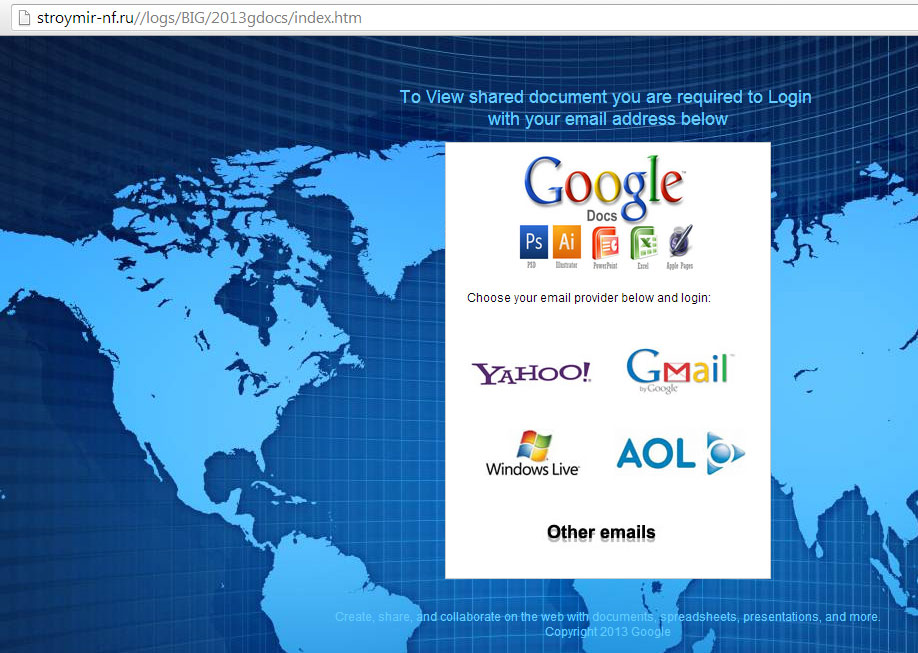
There were a couple of fonts in the message, so it was poorly formatted. The “VIEW HERE” phrase was linked to a website that looked like this:
Google Account Phishing Site
Clicking on any of the logos opens a small box that seems very official looking and you’re invited to enter your email address and password.
In the case of our friend, this all happened to her several days ago. She ultimately thought nothing had happened… until today. What tipped me off was that I got a message from her. I knew right away that it was a scam (the .ru domain name was a big clue), so I checked with other members of our team… and some had received the message and fallen for it.
Today, she found that after several hours of working, she suddenly couldn’t login to her Google Apps (corporate Gmail) account any more. This caused her to panic. So did the phone call from their corporate banker, who had been getting email requests for various bits of account information (including current balances, etc.). Thankfully, their banker refused to provide info via email and was kind enough to pick up the phone. Others may not be so lucky.
When In Doubt… Don’t
So like I said earlier, I’m pretty sure that there’s a new “flavor of the day” scam running at any point in time. So here are a couple of pointers that may help you:
Don’t enter your email address & password into unknown websites. This particular one showed a lot of official-looking logos, so it seemed convincing. That’s why you always want to…
Double-check the address of the website you’re visiting. This particular domain name was “stroymir-nf.ru” — and boy if ever anything screamed “I’m a Russian criminal,” this one does. But the little “Copyright 2013 Google” at the bottom might be enough of a distraction to keep you from noticing your browser’s address bar. So… always double check.
Remember: You shouldn’t have to login to view a Google Doc if you’re already logged into your Gmail account. This goes for Google Apps users as well, of course. Google docs will automatically open for you because you’re already authenticated in your web browser. If you have to enter your Google account info again, it’s a red flag.
What If I Did It Before I Realized What I Was Doing?
If you enter your Google (or other) account info into an unknown website like this one before you realize it’s a scam, immediately go change your password. This is a pain, I know it. But you’ve just given away the keys to your personal kingdom, so you need to change the lock.
In our client’s case, she got kicked out of her Google account 3 days later when the thieves got around to trying to make use of her information. Thankfully, hers was a Google Apps account, and the domain administrator was able to reset her password for her, which effectively kicked the Russian crooks out of her account.
Which brings me to another important point: set up two-factor authentication for your Google account. It’s a little bit of an inconvenience, because it means that you have wait for Google to text a code to your mobile phone before you can log in to your account on a new browser or device, but it’s worth the short delay and the extra step because anyone trying to get into your account will also have to have your cell phone in order to get in. If you haven’t done this yet, now’s the time. Here’s more info about Google’s two-step verification process, including a guide to getting it set up for your account.
Is your laptop absolutely crawling? Can you drive to Starbucks, buy coffee beans, come home and grind them, boil water, dump everything in your French press, wait 4 minutes for it to steep, pour your freshly-brewed cup of coffee into a mug and still get back to your desk in the time it takes your machine to reboot?
That’s where I was earlier this week. And tired of it!
So let’s just say I’m not running a high-end laptop here. Mine is squarely in the middle of the road.
It was perfectly usable 2 years ago when I bought it, but I made it out of my local Best Buy with $20 left of my $500 budget at the time. (I decided a long time ago that laptops are almost disposable, so I refuse to pay big bucks for them.)
But 2 years of updates to Windows 7 (which I love, by the way… another reason why I don’t want to buy a new one yet), 2 years of installing various bits of software, a really bad habit of having 50-60 Chrome tabs open at once, and a tendency to run Photoshop or InDesign (or both) all adds up to a really terrible user experience.
I’d already maxed out the RAM… I did that about 6 months after I bought it.
So… what was left to do?
Well… SSD envy set in about a year ago when I bought my wife an HP Ultrabook. She gets a higher laptop budget because she replaces them less often, and she doesn’t subject them to all the abuse of travel nearly as often as I do. Oh… and she likes them light and thin. And boy is hers ever light and thin! But it’s also blazingly fast. I’m talking… Windows 7 reboots completely in under 10 seconds. Forget that cup of coffee and keep working!
One of the reasons the thing is so darn fast is because of the Solid State Drive (SSD) that was installed from the factory. SSDs, if you aren’t already aware, are much faster than traditional hard drives because they have no moving parts. That’s right, no motors or spindles… just pure NAND flash memory (usually), and lots and lots of speed.
So… I began scheming back then about when (and how) I could get an SSD into my laptop. But the problem is that I do have much more significant storage needs. My laptop has a 500GB drive, and I keep it nearly full with stuff. Could I be more diligent and picky about what stays on my hard drive? Sure. But that takes time. Plus, I’m always of the opinion that I’d rather have that obscure file with me when I’m traveling because of the one time I get somewhere and need something that other people would’ve left on an external drive back home.
Why is that a problem for SSDs? Well… they don’t tend to do so well with higher capacities. And they’re expensive — quite unreasonably so when it comes to the higher capacities. In fact, had I been looking at a 500GB (or bigger) SSD, I’d have been back in the “that costs more than a new machine” zone.
So a few months ago I ran across this nifty idea. Some manufacturers had begun to produce “SSD Caddies” that take the place of an optical (DVD or CD-ROM) drive in a laptop. The idea is that you yank the DVD drive that came with your laptop and drop an SSD into one of these caddies and stick it in your machine instead.
Hmmmmm…. but IÂ use that DVD drive, don’t I?
I decided to find out. When I’d gone more than 30 days without even opening it, I realized that the idea that I needed one was actually legitimately outdated.
So I waited for the right moment… in my case, it was an afternoon of waiting, waiting, waiting for some file to open while something else was running and my physical memory usage was up over 90% and 10 minutes of staring at the dumb blue blinking LED Â that represents hard drive activity had passed without the light ever flickering (because it was on solid from activity)… annnnnnnnd, I’d had enough.
I took the plunge, ordered the parts, and began the long, drawn-out process of waiting 2 business days for shipping. (Sad, I know.)
What Do You Need?
Well first, you’ll need an SSD caddy that matches your machine. At first, I searched for one that was clearly advertised as made for my particular laptop (using the manufacturer name and model number of my laptop). That seemed like a good idea. Price? Around $45 from some unknown online vendor.
Hmmmm…. I wonder…. is this laptop really all that unique?
So, I did some more digging around and found SilverStone Technology. They seem to make a handful of these unusual gadgets, and in my research, the TS09 model seemed like a good fit for my laptop (even though no specific laptops were mentioned).
To make sure it would work, I located the proper method for removing my ODD (optical disk drive), just to do some quick measurements.
Gateway NV57H44u
For my Gateway NV57H44u, the optical drive (DVD writer, in this case) is held in place by a single screw which is located to the right of the Windows 7 COA label and Gateway info sticker.
I few twists with a screwdriver (while the machine was turned off, power supply disconnected and battery removed, of course), and the optical drive came free. I tugged on it to get it out, and checked it with a ruler. It was, in fact, a 12.7mm height drive. This is something of a “standard” size, although you’ll want to confirm with your manufacturer regarding the specs for your device (or just measure like I did).
Optical Drive: Slimline SATA connector
The next thing I wanted to verify was that the optical drive that shipped with my laptop was using a typical “slimline” SATA connector (shown in photo). This is how the device gets power and how it communicates with your system. It was, so the TS09 looked like it might be the right fit. At less than half the price ($20 from Amazon) of the other caddy I’d looked at, this was feeling more and more like the right way to go.
The next big question:Â which SSD to get?
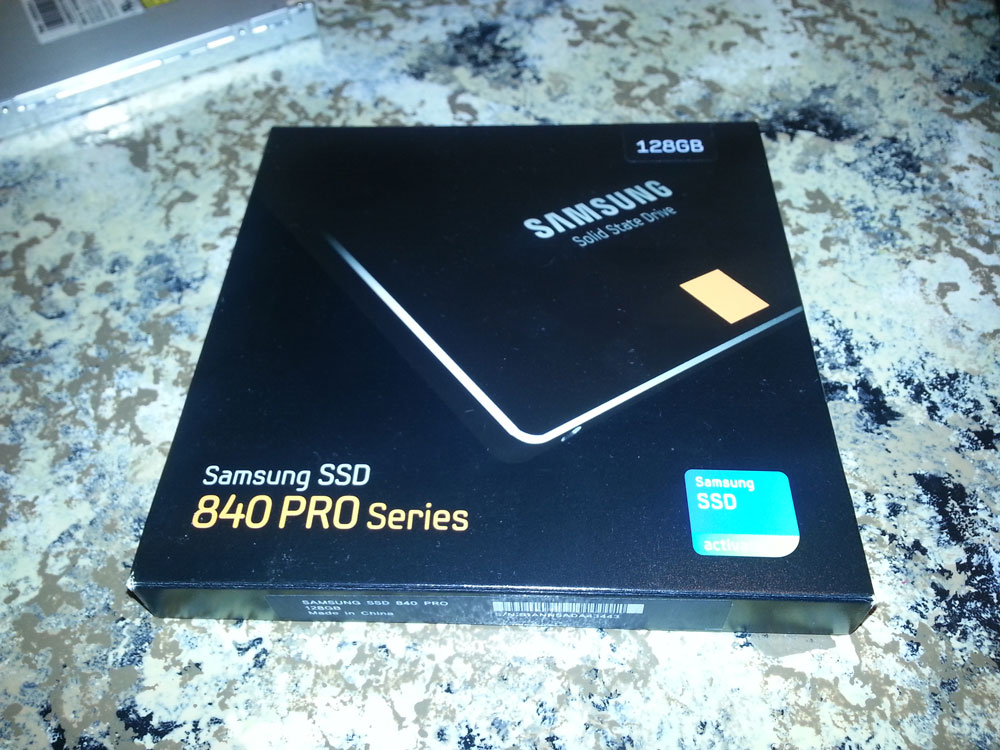
Well, this is where I’d done my homework. After lots of research, I had decided on the Samsung 840 series. The problem you may run into is that there are at least 3 different types of drives bearing that moniker: the 840, the 840 EVO, and the 840 PRO.
Samsung 840 PRO Series 128GB SSD
These drives are significantly different. Sure, they all look nearly identical, and they all have “840” in the name. Frankly, they’re all fairly reputable as well.
The next decision I had to make was about capacity… which, frankly, is all about how much you want to spend. I’d already decided that since my SSD was a new, second hard drive (and I was keeping my original 500GB drive for storage), I could live with having only 128GB on it. This is plenty for me to install Windows 7 and a few core applications that I need to run speedily (Google Chrome, the Adobe Creative Suite apps like Photoshop, InDesign, Illustrator, etc.) and Microsoft Office. All my data would stay on the traditional hard drive that shipped with my laptop.
Now… you can find 128GB SSDs for less. I’m guessing that even the 840 EVO (120GB) or standard 840 would be decent choices. I was willing to spend a little more for the PRO because I just don’t like to gamble with hard drives. Any of them can (and do) fail, so there are certainly no guarantees, but I prefer to give myself the best chances right out of the gate. Also, the PRO model’s additional speed was important to me, since speed was the whole reason to take this project on to begin with.
So you need an SSD and a caddy. That’s it!
Well… at least that’s it for hardware.
Unboxing the 840 PRO was a breeze. It dropped into the TS09 caddy, no problem. The trickiest part was deciding which of the screws to use to cinch it down to the caddy, which shipped with a couple of different sets for you to use. You can’t goof this part up, though, since the screws either fit or they don’t.
Once the drive was secured to the caddy, it only remained to insert the caddy into the laptop. One detail that could easily be missed is that the retaining screw (remember the screw that I removed earlier to loosen the optical drive?) has to screw into something. On my optical drive, there was a small metal bracket which received the screw and held it in place. I removed that bracket from the optical drive (it’s obviously a separate piece) and attached it to the same spot on the caddy, which had a hole in just the right place for it.
Once inserted, I fired up the laptop to make sure that everything was working. I saw a very satisfying green and blue color emanating from the new SSD’s LEDs, which shone through the well-placed hole in the caddy.
OK, Everything’s Installed… Now What?
Well… this is where you have some options about how to proceed.
To get the maximum benefit out of your SSD, you’re going to want it to be your primary drive… meaning the one that Windows (or your O/S of choice) is installed on.
There are two major ways to make this happen: migration or clean install.
If you choose to migrate, you’ll essentially be moving your current Windows installation from your existing hard drive over to your SSD. There are a few advantages to this:
It’s easier (in theory, at least)… the 840 PRO series ships with migration software designed to make this happen for you. (Ironically, it ships on a CD. So, if you’re adding the SSD to your system instead of replacing your primary hard drive with it, you’ll need to plug your optical drive back in to use it.)
You keep your current Windows setup completely intact. This means you don’t need to re-install any software, locate drivers, find product keys, installation files, etc. You’ll also keep your all-too familiar configuration… simple things like desktop backgrounds, sound “themes” and even locations of files will (most likely) all stay exactly the same as before.
You may find that you’re up and running faster. Once you complete the migration, you reboot, and you’re in business. No need to install every Windows update since the beginning of time… and so on.
On the down side, migration:
keeps all the crud that’s built up over time in your Windows installation. Software that you install and subsequently uninstall leaves traces behind… clogging up your Windows registry and ultimately slowing things down. Admittedly, I’m a power user, so I’m more prone to this sort of thing, but it’s worth a consideration. If you have only installed a few pieces of software, this is a non-issue. But if you’re like me and you’ve forgotten about more software than you remember, then those small effects can really add up.
may not work! If you’re moving from a 500GB hard drive (that’s nearly full) to a 128GB hard drive, you can do the math. The important things that need to be moved are the boot partition and your O/S itself. However, if you had only one partition on your hard drive—which is how virtually every laptop ships from the manufacturer—and not separate partitions for your O/S and your data, then you’re going to have problems. The migration process may not adequately handle all the details that need to be handled, leaving you with a mess. On the other hand, if you are moving to an SSD with equivalent (or greater) capacity (or if you have a boot partition that’s equivalent or smaller than your new SSD), then you won’t have this consideration to worry about.
Besides migration, your other option is to perform a clean install of Windows. This means that you’ll be starting fresh… possibly even enjoying that OOBE (“out of box experience”) like you did on day 1 with your PC all over again.
Some of the advantages to a clean install are:
You’ll have a clean slate. Only software that you choose to install will be installed. Often, this single factor alone can produce enough of a speed boost that people will do it even without moving to a faster hard drive.
You can map out your new configuration as you see fit. Where will your “My Documents” folder be located? (i.e. Which drive will it live on?) Which programs do you want installed on the SSD (because you particularly need them to run faster) and which ones can stay on your legacy hard drive?
Keeping your SSD clutter-free. I personally don’t want to store data and other static files unnecessarily on the SSD. It’s intended to be lean, fast, and unencumbered. My older hard drive can shoulder the load for storage and so forth.
Disadvantages to a clean install include:
It can be a pain to do. Ever tried installing Windows 7 to a laptop without a Windows 7 installation CD/DVD? Even more fun… without a place to put the CD/DVD (since you yanked your DVD drive out to make room for your SSD)! A little extra effort (and perhaps some downright creativity) is required to pull this off.
You may be out of commission longer. Nothing will be installed on your laptop until you install it. This means you’ll start with the essentials (Windows, Chrome, and your most-used software), and then you may find yourself discovering another missing item weeks afterward.
Once you’re up and running, additional energy may be required to get everything back to where you like it.
For me, the decision between a migration and a clean install was a complete no-brainer: hands-down, I wanted a clean install. I was looking to squeeze every possible ounce of benefit (read: speed) out of this project. There’s no better way to pull that off than to start fresh with Windows. Being the extremist that I am (at times), I wanted to even be sure I avoided any of the bloatware that Gateway originally installed on my machine. So… I chose to not even bother trying to use the “recovery” partition. Instead, I went on the hunt for an official Microsoft image of Windows 7 to install.
Being a geek, I’ve performed many a clean install of Windows. Even so, it had been a while… so, I made a couple of blunders that cost me a little bit of time. Here are some notes so you can perhaps avoid running into any problems yourself.
Prepare your Windows installer ahead of time. Before you take the big plunge and render your existing setup inoperable, do yourself a favor and get everything ready. It’s a long story, but I ended up needing to use another computer to do this. Chances are, you don’t have a Windows CD or DVD to install from, since most manufacturers quit distributing them long ago. So, you’ll have to work around this dilemma, which means you’re going to need a 4GB or larger USB flash drive, and you’ll also need to…
Understand which version of Windows you have. If you bought your PC at retail, then you have the “OEM” version of Windows. That product key on the colorful COA sticker on the bottom of your laptop won’t work if you try to install the “retail” version of Windows. You also need to know if you’re using the 32-bit or 64-bit version. Once you figure out which one you have (mine worked out to be “Windows 7 64-bit Home Premium OEM”), you’ll need to download an .ISO file (DVD image) for that version. There are lots of places to look for these… some of them legitimate (read: legal) and some of them less so. To save time and energy, I located a version that included SP1 (“Service Pack 1”), which had a huge batch of the earliest Windows 7 updates rolled up into it already.
Create a bootable USB drive with your Windows installer on it. Once you’ve located and downloaded an appropriate .ISO file, you can use Microsoft’s official Windows 7 USB/DVD download tool (more info about this here) to push the Windows 7 installer to your USB flash drive. (Note: I had a little trouble with this tool… in fact, it never did completely finish without an error. But I finally realized that if the tool made it to 98% before the error occurred, then chances are it actually had finished. This turned out to be true.)
Before you get started installing, download all the drivers for your machine. Hit your laptop manufacturer’s website and locate the downloads for your model number. You’re going to need (at least): the chipset driver, video driver, audio driver, and network drivers for both LAN and wireless. You may also need to get drivers for your touchpad, webcam, card reader, bluetooth device and maybe some other peripherals in your system. That last batch can be downloaded from your new, fresh Windows install if necessary. But you’ll want the first batch in a folder on your USB stick so they’ll be handy when Windows comes up for the first time.
Block off some time and be ready to reboot quite a few times. The actual Windows 7 installation went pretty quickly for me… maybe even under an hour. Once you have your basic driver set installed, however, Windows 7 will start pulling down updates. They number into the hundreds… and that’s when you start from SP1! Some of your drivers will even require a reboot upon installation, which is a good idea.
Get your other software installation media ready to go as well. If you need to install other programs (such as Microsoft Office apps) from a CD, it’s a good idea to get those installers onto your USB stick ahead of time also. Many, many programs can be downloaded, so if you aren’t able to locate discs, it may not be the end of the world.
Once you’ve got your tools in place, then plug that USB stick in and go!
My laptop had no problem booting from the USB flash drive, and when the Windows 7 installer came up, it was pretty clear which drive I wanted to target for the installation. Be careful to select the right drive, though, as choosing the wrong option from the installer could end up wiping your existing hard drive. I plan to keep all the data on that drive (eventually I’ll delete the Windows folder, I guess), especially at first, so I made sure that Windows 7 got installed to my brand new SSD.
Once the Windows 7 installer reaches the point where it needs to reboot, you may want to take a look at your BIOS or “Boot Order” settings. My machine’s BIOS didn’t recognize the SSD as a hard drive in the boot sequence options, which led to a moment of panic. It did, however, still show the option of booting from the CD-ROM/DVD-ROM drive, which I realized pointed to the SATA channel that the SSD was connected to. So, I set the machine up to boot from that first (once I was finished with the USB flash drive portion of the process), and it worked like a charm.
As the installation process completes and a reboot is necessary, you may see an option to select from a couple of different Windows 7 installations at boot-up. The “top” option will be your new one. In my case, I can still boot to the previous Windows 7 install (from my legacy hard drive) using the 2nd option. This is nice for when you need to locate that one setting (piece of software, etc.) you forgot about. Later, you can remove the 2nd entry if you want to eliminate this step in the boot process.
The Results
I’ve now had a couple of days to enjoy using my machine since installing the SSD and getting a clean install of Windows 7 going. Wow, what a difference! I’m certainly seeing all the speed benefits I was hoping for. All the waiting from hard drive lag is gone. Reads and writes to the drive are  pretty much invisible to me now. The machine boots up in a fraction of the time that it used to take. Some of the more hard-drive heavy software tools I use regularly (Photoshop, etc.) are faster than I’ve ever seen them on my own hardware.
An unexpected benefit that I’m seeing is a reduction in both heat and noise. The machine is quieter than ever… partly because the 2nd hard drive (meaning my legacy hard drive, which is now exclusively for storage) doesn’t have the constant read/write activity that made it noisy and caused it to get hot. In turn, with less heat in the chassis, the fan is running a lot less often. Those two combine to make this the quietest laptop I’ve ever owned.
Regarding battery life, I had expected it might suffer with the two hard drives. However, the power consumption of my SSD is virtually nil when compared to the legacy hard drive. Since the SSD is my boot drive (and my Windows drive), the reads and writes to the legacy drive are cut by 90% or more. Thus, I’m expecting to see a nice bump in battery life. I haven’t done any actual measurement of this yet, so I lack the evidence to make this claim unequivocally, but it wouldn’t surprise me if this bears out after some real testing.
In short, this is the best ~$150 I’ve ever spent upgrading a laptop. There is truly no comparison between the “after” and the “before.” I highly recommend it.
Even factoring in all the time I’ve spent… whether checking prices and doing my pre-planning or actually installing the gear and/or Windows and the accompanying joys of getting everything back up and running, this is well worth the effort. My payoff in terms of speed, responsiveness, and overall usability are beyond my wildest expectations.
In short: if you’re suffering from a slow laptop, add an SSD via a caddy and get yourself a major speed boost!